12. November 2022 - Anika Semmer
How to Make Wine Cork Coasters as Enchanting Stars | Tutorial
in

Crafting
Share
Wine corks are great for handicrafts. With creativity, a soldering iron and a hot glue gun this is how to make wine cork coasters. Find out how to make the pretty stars and what you need here.
Don’t throw them away! That was the theme this year when a bottle of wine was empty. The wine corks get a new life as pretty coasters for candles and glasses. They fit especially well into the Advent and Christmas season with their star shape, but by foregoing Christmas patterns, you can easily use them all year round.
How to make wine cork coasters as stars is not difficult, you need a soldering iron and all-purpose glue or better a hot glue gun. So that they can be wiped clean and spilled drinks or dripped wax can be easily wiped off or even scraped off, it is advisable to burn in patterns instead of painting them on. For me, this was the first realisation of a hazy idea to work the corks with the soldering iron for burn painting and I am very happy with the result. The best thing: If you use a soldering iron with tips and stamps like I do, it’s really easy to burn beautiful patterns into the wine corks.
I think it’s great to give old objects a new life. This upcycling is a trend I’m all for, because we create so much waste in life and you can still make great things out of a lot of it! On Abenteuer Freundschaft you can find many different crafting ideas with instructions on how to do it: From a cotton pad dispenser, a round gift box or toilet roll gift box. Plus lots of ideas for the festive season from cork Christmas ornaments, clothes peg stars to toilet roll Advent calendar, kitchen roll Advent calendar and Advent calendar in a jar.
You can find all the materials I used to make the cork coasters on the materials list below.
Material List*
- Wine corks (3 1/4 per coaster)
- Fluted bread knife
- Branding soldering iron (perfect with stamp attachments)
- Hot glue gun
- Red and white dotted fabric ribbon, diameter 1,2 cm
- Gemstones (transparent lancets)
- Measuring tape
- Pencil
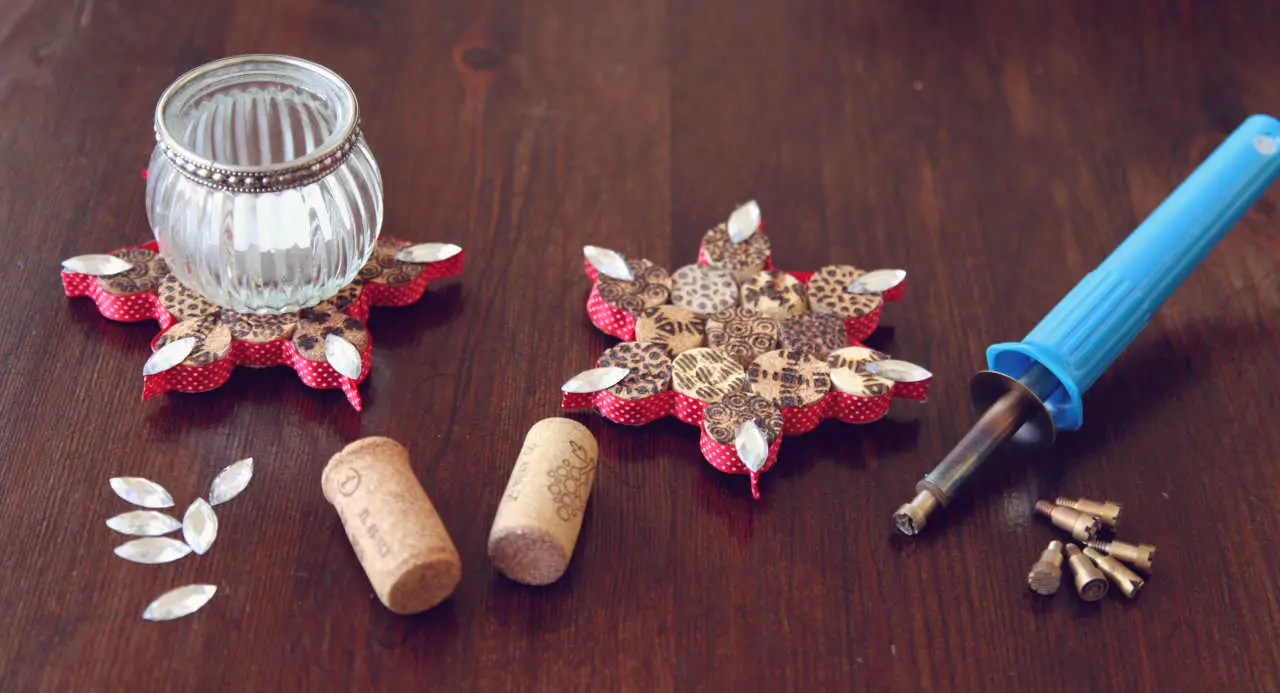
How to Make Wine Cork Coasters as Beautiful Stars
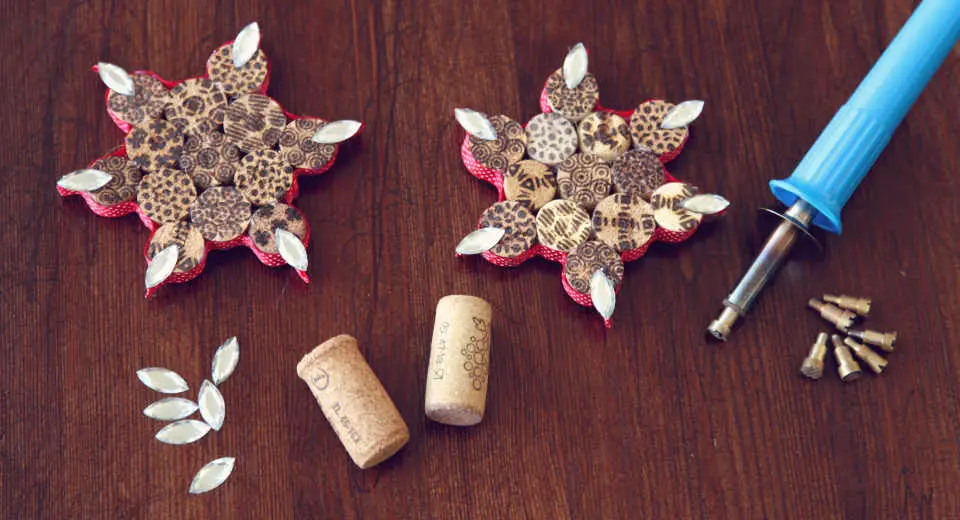
DIY wine cork coasters
It’s worth making a set of 4 or 6 coasters from corks. Most of the time is spent waiting for the various stamp attachments on the soldering iron to cool down so you can change them. This way you work through the patterns one after the other in a time-efficient way. I used 8 different stamps, so it definitely saved a lot of time!
1. Cutting the Corks and Burning in the Patterns
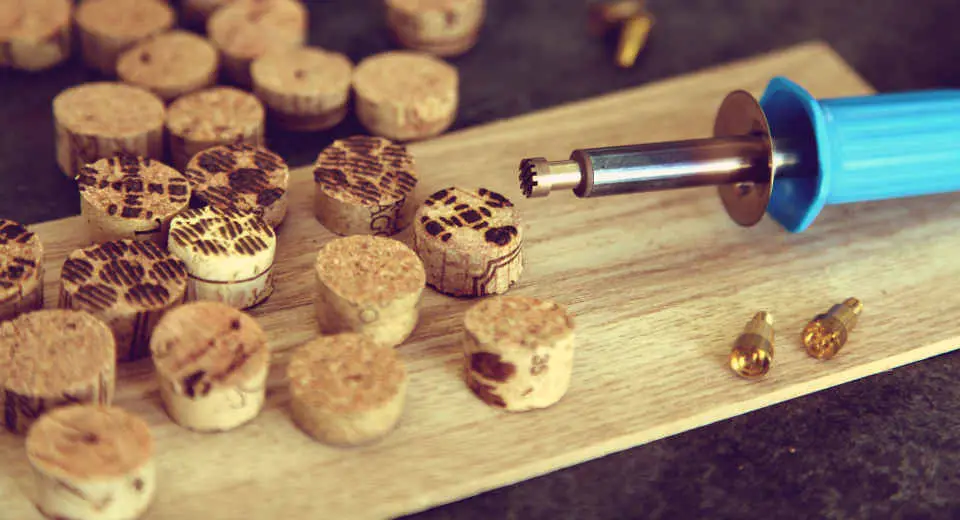
Branding with the soldering iron works for anyone with stamp attachments
Not every cork is exactly the same length, some have bulges at the ends. It is important that you try to cut the corks into 1 cm slices of the same thickness. The best way to do this is to mark the cuts at 1.2 cm intervals with a tape measure, use a serrated knife and cut the corks evenly into slices. A bread knife has proven best for this.
You will need 13 cork slices for each cork coaster.
Then divide the cork slices into patterns, heat up the soldering iron and burn in the patterns one after the other. Of course, you can also do this freehand if you don’t have a stamp attachment. Be careful to set some patterns very densely so that a large amount of black is burnt onto the cork and others very discreetly to leave more of the cork. It’s the mix that makes the beautiful look!
2. Glue the Star Together
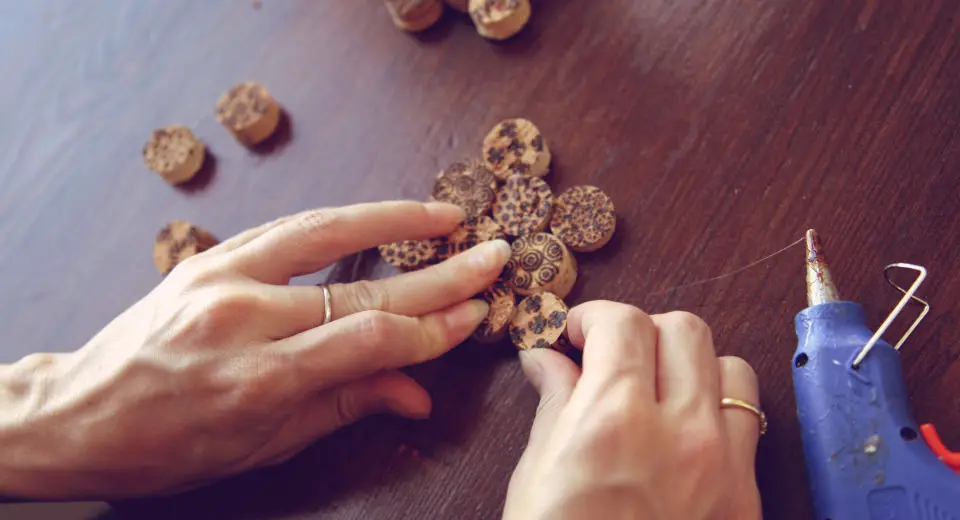
Glue the cork discs close together with at least two glue spots
Choose cork discs with different patterns and place them as you want to glue them together. Place one cork disc in the middle and surround it with 6 thicker cork discs. In each of the six indentations between the cork discs, place another cork as a star point.
Now glue the cork discs together with the hot glue gun as shown in the picture and remove any excess glue before the glue has dried. To do this, place the coaster on a mat so that the cork discs are glued to each other exactly level on the underside and form a straight surface.
3. How to Finalize the Star Wine Cork Coaster With a Border and Rhinestones
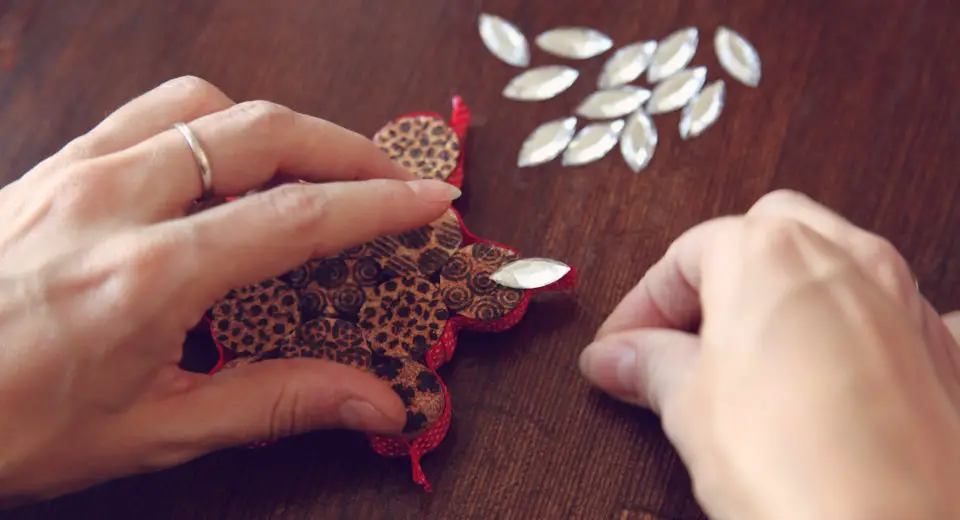
Finally, glue the transparent rhinestones to the outside
Turn the cork coasters upside down. The ground level side is the top side so that glasses and candle stands with delicate feet do not tip over. The small irregularities on the underside balance each other out and do not affect the stable stand of the coasters.
Now glue the ribbon around the star. To create the points, leave a piece of ribbon about 1 cm or a fingertip wide protruding from the centre of the star, fold it over and press it together as a point. Work slowly and immediately smooth the ribbon over the hot glue to avoid creases.
Finally, glue a rhinestone lancet onto each cork prong from the centre to the tip of the overlapping ribbon prong.
Have fun making coasters out of corks!
Are you always looking for new ideas? Have a browse on Abenteuer Freundschaft in our colourful categories with colourful leisure tips for activities with friends, the partner and for families. Whether at home or outdoors, exciting, cosy or romantic: life is too short not to enjoy it to the fullest with your favourite people!
No more boredom! Stay up to date and follow us on Facebook and Instagram and never miss a good idea again! 🙂


*There are affiliate links in this article. This means that if you buy a product via such a link, Abenteuer Freundschaft may receive a small commission without the product becoming more expensive.
Similar Posts
Advertisement
Similar Posts

Book Gift Idea for a Creative Voucher + Free Printable | Tutorial
Gift voucher or travel card to Fantasyland? This is how to make a gift voucher for bookworms with a free template to print out.
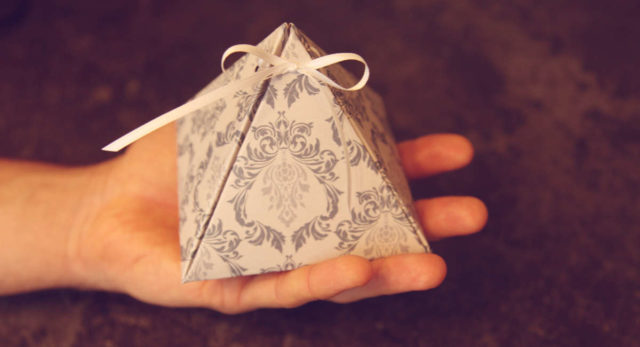
How to Make a Pyramid Gift Box From Cardboard | Tutorial
Perfect for chocolates, jewellery and small gifts: The complete instructions for a sophisticated gift box without gluing.
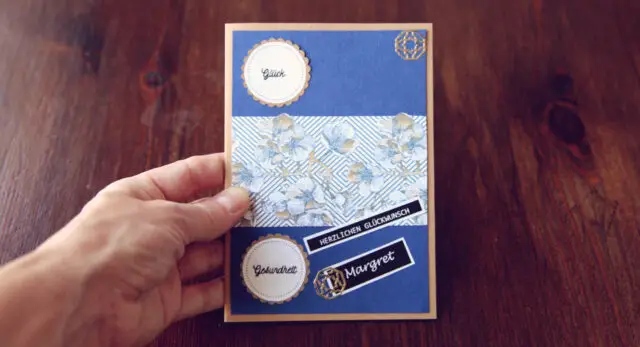
Handmade Birthday Card With Warm Wishes - How to Make It | Tutorial
I wish you ... ? Make a special person happy on their birthday and create a greeting card with personal wishes.
Make an Envelope – With Template to Print Out | Tutorial
Faster to make than to buy at the supermarket is rubbish? You can make this envelope in just 10 minutes. It's that easy!

How to Make a Cute Birth Card With Elephant | Tutorial
Bet this birth card will end up in the family photo album. Make your loved ones happy and surprise them with a homemade card for the birth of their little treasure.

Advent Calendar With Quotes and Compliments - How to Do It Yourself | Tutorial
The complete tutorial for making a personal advent calendar for adults.
