It’s easy to make a cotton pad dispenser out of a Prinlges can with beautiful motif paper and rhinestones! A great homemade beauty gift that looks great in the bathroom. This is how the Pringles upcycling works.
Who would have thought that an empty crisps can could be a beauty eye-catcher for the bathroom? I’m a big fan of giving disposable objects a new life and have made decorations and gifts out of empty brunch wrappers, the cardboard tubes in toilet paper rolls and Pringles upcycling. You can’t tell by looking at them that their original purpose is and at the same time you’re doing something good for the environment. I think that’s great.
The Pringles can has the perfect diameter for making cotton pad dispensers and can be cut to the right size – because every bathroom cupboard is different in height. It is coated on the inside, stable and can be closed with a transparent lid, so no dust gets in.
There are many more craft ideas with Pringles upcycling at Greatime. You can not only make a cotton wool pad dispenser out of a can – I have also made a round gift box out of it.
All the craft materials I used to make the cotton pad dispenser can be found on amazon*. It is worth using high-quality motif paper that goes well with the bathroom décor.
Material List*
- 1 empty Pringles can
- Motif cardboard, I used this one: The Far East
- Hot glue gun
- Measuring tape
- Set square
- Pencil
- Scissors
- Cutter
- Magic Ocean gem stones
- Bread knife
Pringles Upcycling – How to Make a Cotton Pad Dispenser
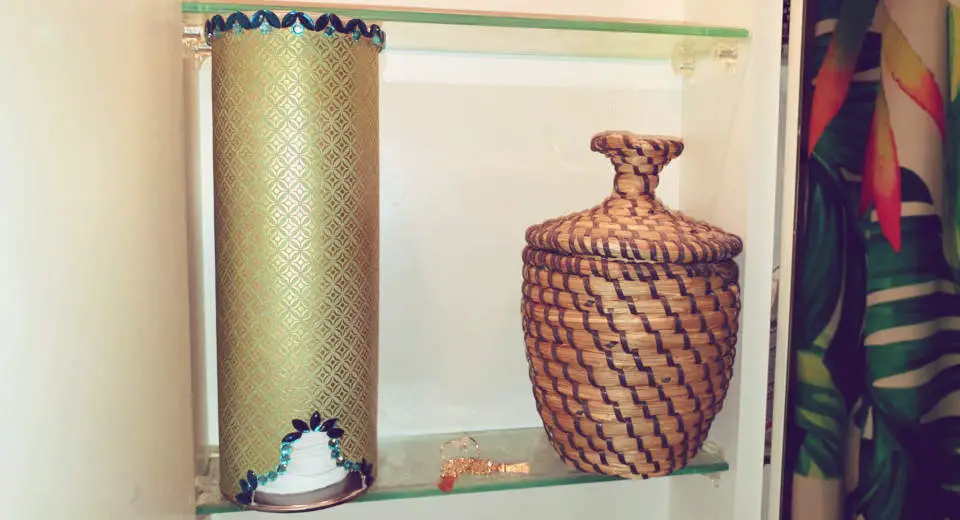
Time: about 1 hour
Before you start making the cotton pad dispenser, think about where it will stand. For me, it’s in a bathroom cupboard and I’ve shortened the cotton pad box to exactly the perfect height! My bathroom is also in sea tones – I chose the motif card and rhinestones to match.
1. Cutting the Pringles Can
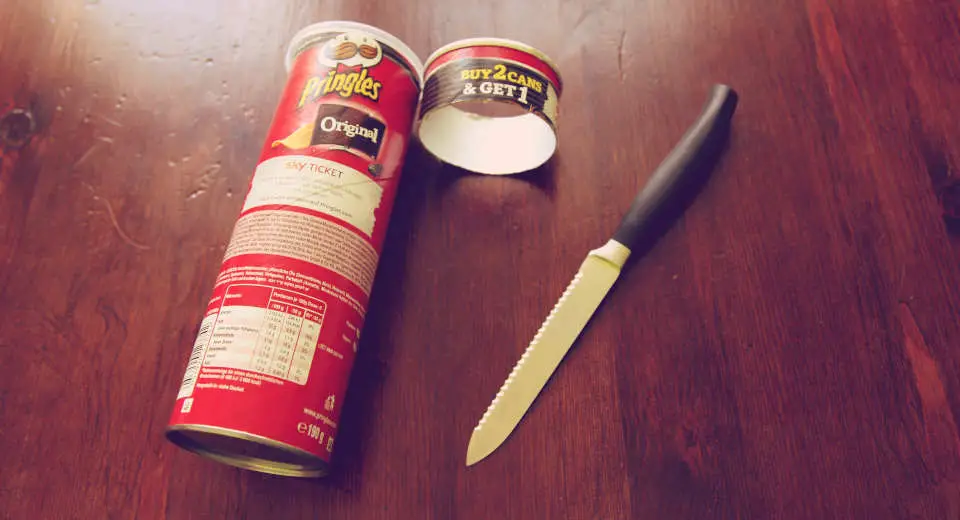
Use a bread knife to cut the top of the Pringles can as evenly as possible to the desired height and cut the edge straight with the scissors. It is 25 cm long and has a diameter of 24.5 cm. Now wipe out the inside of the Pringles tin and remove the chip residue.
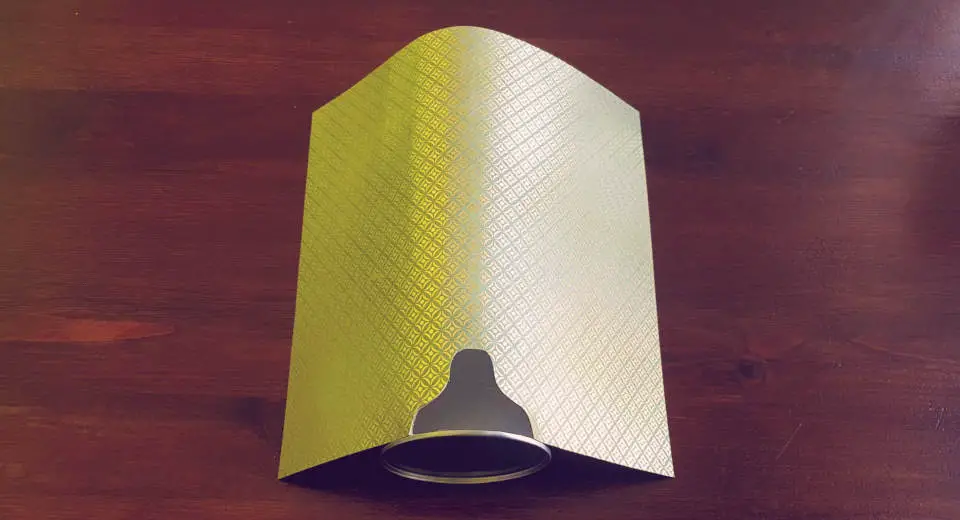
Then measure out your individual length of the cotton pad dispenser and mark the rectangle on the back of the motif cardboard with which you will glue the Pringles can with a triangle and pencil and cut it out. The width is 24.5 cm.
Now mark the opening for the cotton pads on the motif cardboard first. I drew it as a curved arc – it is 7 cm long and 4 cm high and I marked it exactly in the middle at the bottom of the motif cardboard and then cut it out.
Place the card around the box and use the sharp pencil to draw the curved shape of the opening for the cotton pads, which is cut out, on the box. Now cut out the opening a little larger than you have drawn it. Glue the motif card over the edge. The best way to do this is with a sharp cutter knife.
Then glue the motif cardboard onto the Pringles can. To make the cotton pad dispenser look nice, start at the opening of the cotton pad dispenser and glue the motif cardboard exactly onto the slightly larger cut-out on the Pringles can. Make sure that the edge of the cardboard is flush with the metal edge of the box.
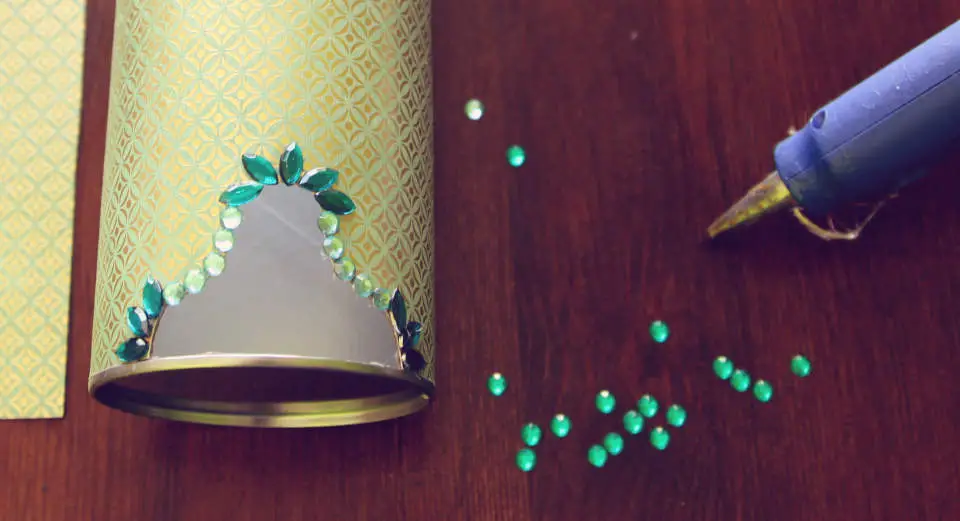
For the cotton pad opening, I glued on a pattern of leaf-shaped and small round rhinestones in turquoise and light blue as shown in the picture. Start with the leaf-shaped rhinestones (5 on top and 3 each on the bottom right and left) and fill the space in between with the small round rhinestones (I had 5 on each side).
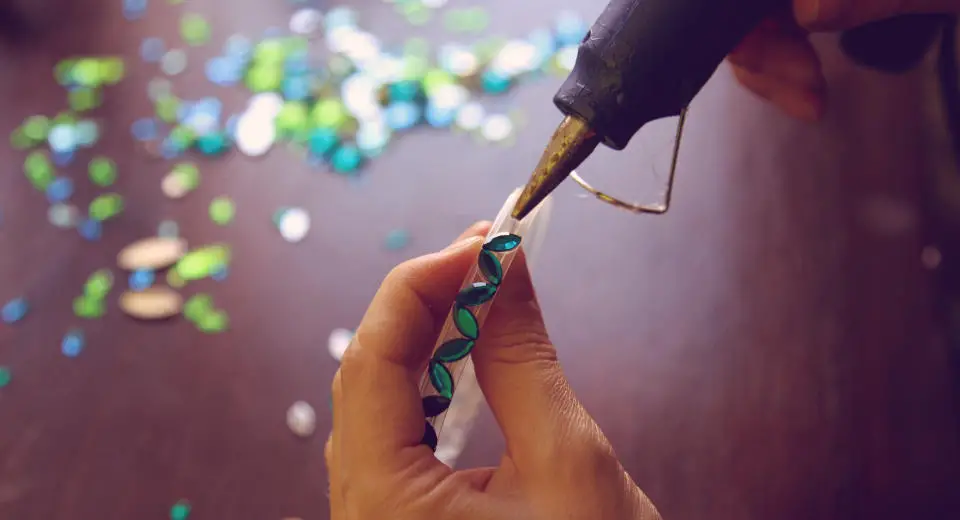
Then glue a jagged border of leaf-shaped rhinestones in turquoise evenly on the transparent lid and glue round rhinestones in light blue on the bottom edge (see picture). Make sure that the rhinestones do not protrude over the top edge.
Discover even more beautiful craft ideas and ideas for finding gifts at Greatime! Are you creative and have some great craft ideas of your own? We are looking for guest authors and would love to hear from you via email!
If you like our page, we’d love your Like on Facebook and Instagram. 😉
*There are affiliate links in this article. This means that if you buy a product via such a link, Greatime may receive a small commission without the product becoming more expensive.

![Pringles Upcycling How To Make A Cotton Pad Dispenser Tutorial [Uber En="How*to*make*a*Pringles*upcycling*cotton*pad*dispenser" De="Wattepadspender*basteln*aus*einer*Pringelsdose*mit*Schmucksteinen"]](https://greatime.de/wp-content/uploads/2019/03/wattepadspender-basteln-aus-pringelsdose.jpg)
![Uber En Quot Easter Egg Garland Quot De Quot Ostergirlande Mit Ostereiern Quot [Uber En="Make*an*Easter*egg*garland*DIY*with*colour*cards*in*a*beautiful*colour*gradient" De="Aus*Farbpaletten*eine*Ostergirlande*basteln*in*einem*wunderschönen*Farbverlauf"]](https://greatime.de/wp-content/uploads/2022/04/ostergirlande-basteln-eier-hase.jpg)
![Uber En Quot Toilet Roll Chick Quot De Quot Osterk Ken Quot [Uber En="How*to*make*a*toilet*roll*chick" De="Osterküken*basteln*aus*Klopapierrollen"]](https://greatime.de/wp-content/uploads/2018/03/osterkueken-aus-klopapierrolle-3.jpg)
![Uber En Quot Diy Pop Up Card With An Elephant Quot De Quot S E Pop Up Karte Quot [Uber En="How*to*make*a*cute*easy*DIY*pop-up*card*with*an*elephant" De="Süße*Pop-Up-Karte*mit*Tiermotiv*basteln*-*So*geht's"]](https://greatime.de/wp-content/uploads/2020/07/pop-up-karte-mit-tiermotiv-basteln-titelbild.jpg)