Crafting a cuddly Easter bunny out of wool is not difficult at all. As a small cuddly toy, Easter gift or Easter table decoration, a pompom Easter bunny are a lovely DIY idea.
Homemade Easter decorations are the most beautiful and even if you want to give someone a present, it is the most personal gesture to present a gift that you have made yourself. Besides Easter eggs, the most popular Easter motif is of course the Easter bunny. And you can easily make a cute Easter bunny out of wool, felt and beads.
The secret is to make pompoms. This is the name given to fluffy balls of wool with fringes in all directions, such as the pom-poms that hang from many hats. You can easily make a pompom Easter bunny out of these!
This Is What You Need to Make a Pompom Easter Bunny
- 1-2 ball of wool (white, grey, piebald or brown)
- 3 mm thick craft felt in pink + bunny colour
- 2 black glass wax beads for the eyes
- nylon string or string for the string hairs
- Pencil for pre-painting
- Adhesive, preferably a hot glue gun*
- Pompom maker in 3 sizes
- Cardboard for ear templates
How to Make a Pompom Easter Bunny
Making Pompoms for the Easter Bunnies
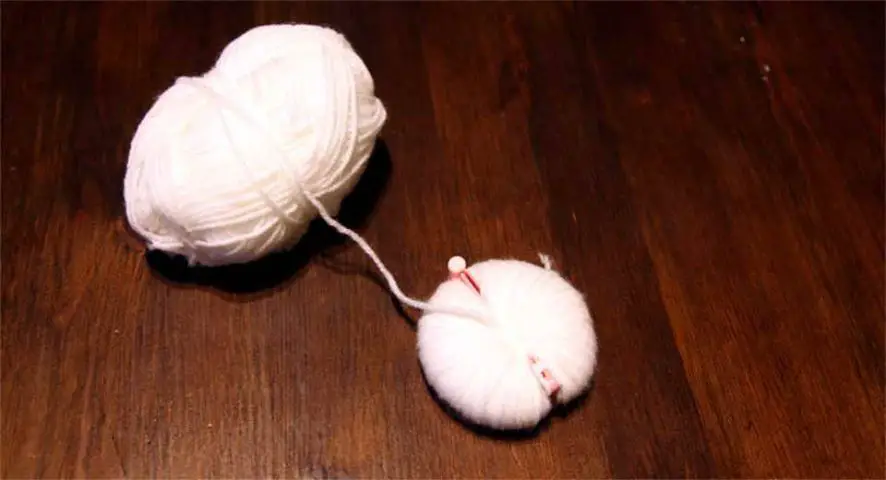
The main work is to make 3 pompoms of different sizes. The biggest pompom will be the body, a medium one the head and a small one the fluffy tail of the pompom Easter bunny.
For this purpose, we recommend you to buy a ready-made Pompon Maker Set made of plastic, because this way you save yourself from making matching templates out of cardboard and it is also easier to work with them. A set of 4 pompom makers in different sizes costs only about 8 euros on amazon.
(However, if you feel like cutting out the pompom discs from cardboard yourself, you can find here a good tutorial on how to do it).
Making pompoms is basically about winding wool onto two half circles. You should work neatly and always wind evenly from left to right and again from right to left until the hole in the middle has almost closed so that the pompom becomes even.
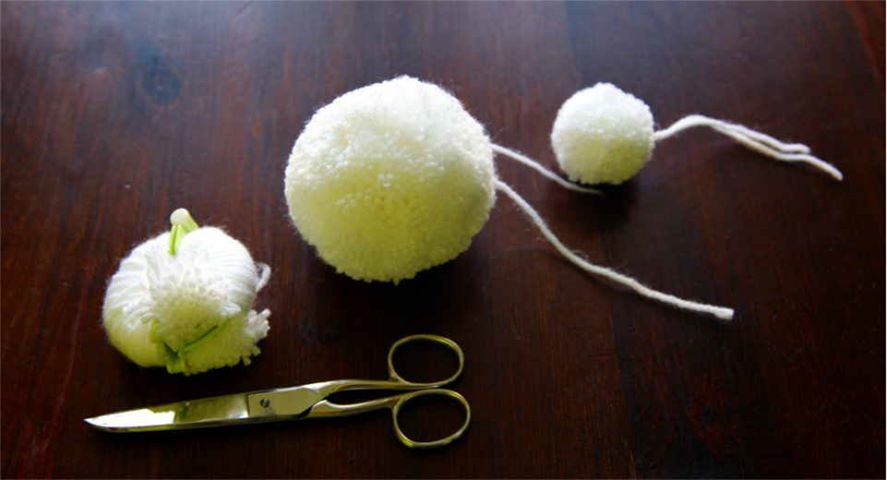
Then you can close the two sides of the pompom maker and hook them together. And now the most tedious part of making the big pompom begins: cutting the wool threads with scissors. You need patience for this, the thinner the thread and the bigger the pompom, the slower the progress. You really need a good pair of scissors!

Tying the Pompoms Together
Now all you have to do is tie a piece of wool thread about 20 cm long along the template around the pompom and knot it tightly. To be on the safe side, we did this twice, with the knots on opposite sides. Make the knots a little longer, as you will need them later.
Then take off the pompom templates. Now you can trim the pompoms evenly with scissors or bring them to the desired sizes. Leave the knotted strings longer and use them to knot the pompoms together. For example, you press the head pompom against the body pompom and tie the knotted cord of the former around the latter and knot it there. When you have knotted your bunny in this way, you can trim the overhanging threads.
Making Face and Ears of the Pompom Easter Bunny
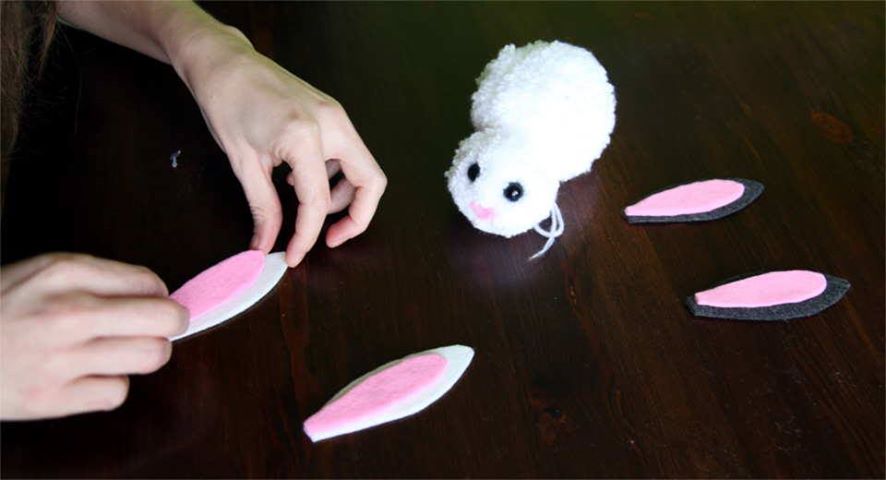
Now you are almost done, only the ears and the face of your Easter bunny are missing. For the eyes, glue two black beads to the left and right of the head. The best way to do this is with a hot glue gun.
For the nose, cut a small triangle with rounded corners out of pink felt and draw the bunny’s nose on it in pencil. Then glue this nose on as well. Cut 6 pieces of nylon string in the desired whisker length and glue them to the nose.
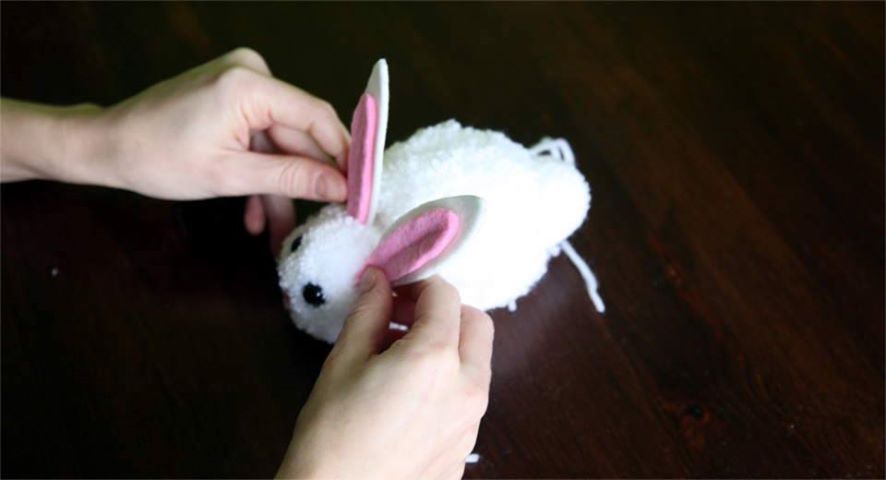
Cut the ears out of felt too, but use 2 colours for each ear: one in the same colour as the pompoms, e.g. white, and one pink for the inside of the ear. The inside should be smaller and you glue it to the other larger piece of felt that represents the fur side of the ear. At the bottom end, press the ear firmly together and glue it. Then glue the ears onto your rabbit’s head.
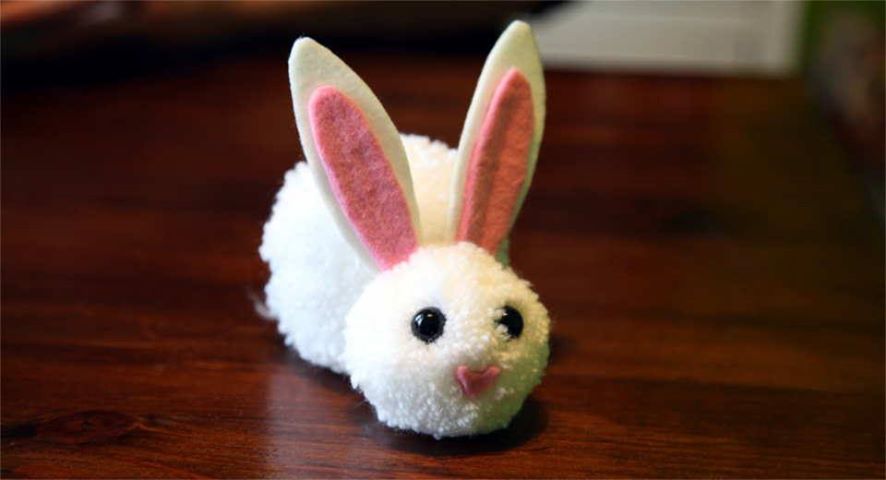
Finally, you can glue whiskers to the nose of your pompom Easter bunny. We chose nylon string for our white bunny and brown string for the pied bunny.

Congratulations! You have made your first own pompom Easter bunny. 🙂
Looking for more Easter ideas? At Greatime you can also find instructions on how to make clean Easter bunnies or chicks out of toilet paper rolls and an Easter lamb out of pompoms. You can also learn how to dye Easter eggs naturally and how to add patterns to Easter eggs. Happy Easter!
We also have gift tips and ideas for activities with friends, family and your partner.
If you like our page, we’d love your Like on Facebook and Instagram. 😉
*This article contains affiliate links. If you buy a product through it, we get a small commission and you support us without paying a cent more.

![Pompom Easter Bunny How To Make Your Own Cute Bunny Tutorial [Uber En="A*Pompom*Easter*bunny*is*easy*to*make" De="Pompon-Osterhasen*sind*süß*und*knuddelig"]](https://greatime.de/wp-content/uploads/2018/03/pompon-osterhasen-titelbild.jpg)
![Uber En Quot Sealing An Envelope Quot De Quot Briefumschlag Versiegeln Quot [Uber En="Make*an*envelope*and*seal*it*with*a*seal*and*wax." De="Briefumschlag*basteln*und*gestalten*sowie*am*Schluß*mit*Siegel*und*Wachs*verschließen"]](https://greatime.de/wp-content/uploads/2020/07/briefumschlag-basteln-gestalten-siegelwachs.jpg)
![Uber En Quot Toilet Roll Star Quot De Quot Weihnachtsstern Quot [Uber En="How*to*make*your*own*toilet*roll*star*with*rhinestones" De="Einen*Weihnachtsstern*mit*Strass*zum*Aufhängen*als*Weihnachtsdeko*selber*machen"]](https://greatime.de/wp-content/uploads/2017/12/weihnachtsdeko-selber-machen-weihnachtsstern-mit-strasssteinen.jpg)
![Uber En Quot Three Gift Boxes Quot De Quot Drei Geschenkboxen Quot [Uber En="In*just*a*few*minutes*you*can*make*a*toilet*roll*gift*box." De="In*wenigen*Minuten*kann*man*aus*einer*Klorolle*eine*Geschenkbox*basteln."]](https://greatime.de/wp-content/uploads/2018/12/geschenkverpackungaus-klorolle-4.jpg)