Colorful Easter egg design is simply part of Easter. With gaffer tape, washi tape, Easter egg dye and a graphic liner you can easily conjure up modern patterns that look great. This is how to make patterned Easter eggs with tape.
Design modern Easter eggs – this is one of my plans this year. Since I find graphically designed decoration super nice and bright colors to Easter simply belong, I started to experiment: with gaffer tape, washi tape, egg dye and a permament marker. Into the Easter nest fell colorful eggs with ornaments, which you can easily make yourself in 3 steps – even with children.
There are lots of great ideas for designing Easter eggs and we tried a few ourselves this year. From the classic from my childhood – gluing Easter eggs with the napkin technique – and with different nail polish marbled last minute Easter eggs to colored Easter eggs with ornaments. How to manage to get beautiful colored Easter eggs with white patterns and ideas for beautiful ornaments and for decorating, you will learn in this article.
Looking for more DIY ideas for Easter? On Greatime there are many special ideas to discover – from homemade Easter basket made of sugar wool with a balloon, cute decorative Easter animals, craft ideas with loo rolls for families with children and more.
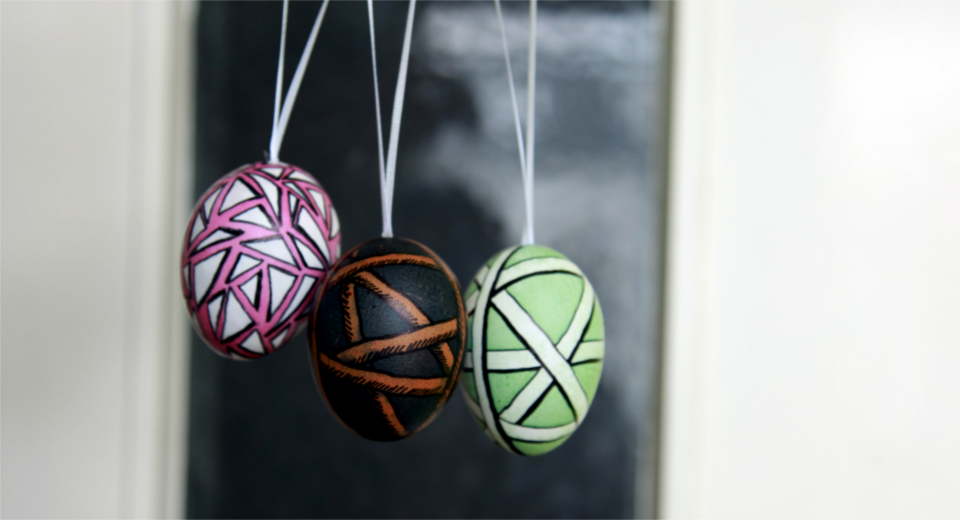
Materials* for Patterned Easter Eggs
- Blown out eggs (here are tips for blowing them out)
- Easter egg dye
- Permanent marker 3 mm
- Gaffer tape
- Washi tape 5 mm
- Old pantyhose
- Household gloves (for coloring eggs)
- Household rubber bands (for coloring eggs)
- Newspaper
How to Make Patterned Easter Eggs
Let’s go! It’s only 3 steps to individual and extraordinary Easter eggs that others will envy you for.
1. Stick Eggs with Gaffer Tape and Washi Tape

Easter egg with circumferential tape: For the circumferential tape, which decorates the egg crossing each other, you need 5 mm wide Washi Tape. You start at a puncture hole of the egg and paste over the holes to blow out with two crossing tape strips all around. This prevents water from getting into the egg. Then you tape the egg with strips of tape running over each other.
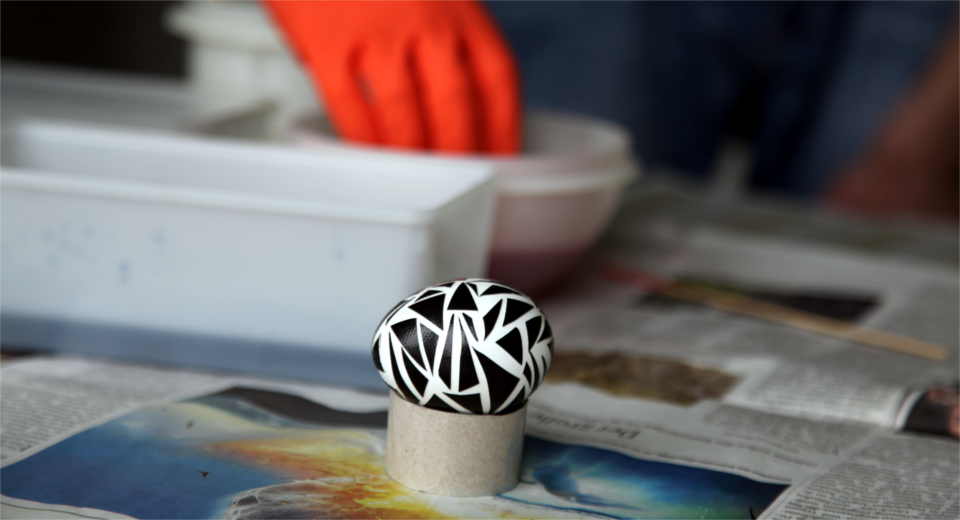
Easter egg with splinters: The patterns with the triangles you get when designing Easter eggs with ornaments with gaffer tape. This fabric tape is particularly adhesive, so you can also stick small snippets and they are not immediately detached when coloring. Simply cut out triangles in different sizes and stick them on. Either until the whole egg is glued, or only parts.
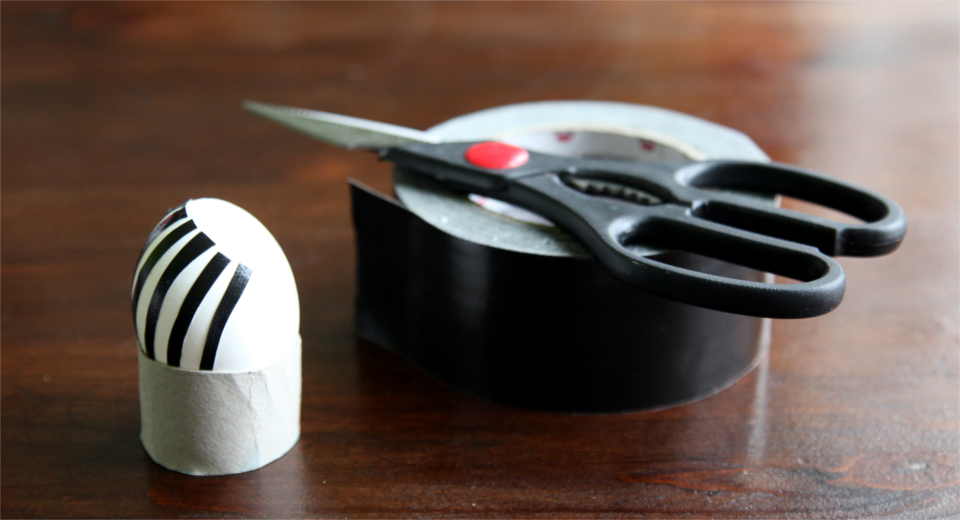
Zebra egg with ornaments: Cut out half-round strips of gaffer tape and stick them on in zebra look.
Important: When the egg is ready to be taped, press the tape firmly several times and paint over it until it adheres optimally so that no paint penetrates under the tape.
2. How to Dye the Easter eggs
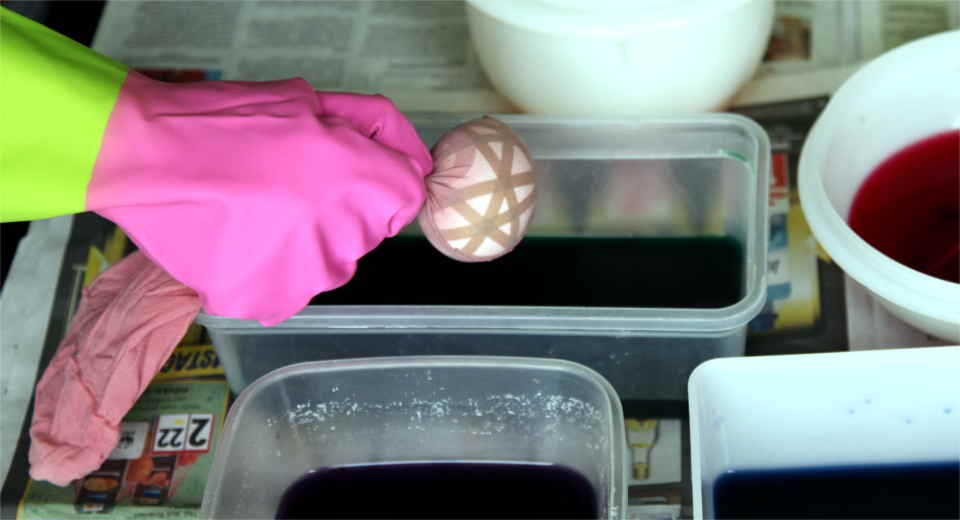
Now put the taped Easter egg into a pair of pantyhose and pull it as tight as possible around the egg and fix the whole thing with a rubber band.
The egg in the stocking is placed in the dye bath and turned for about 5-10 minutes until it has taken on an even color. Then carefully remove from the stocking and place in an egg cup on newspaper to dry.
For dyeing, I used Easter egg dye from Heitmann – it takes about 5-10 minutes to dye. Natural dyes take longer and are risky because of that, especially the rice paper based washi tape comes off easier the longer it soaks in the dye water.
3. Design Patterned Easter Eggs With Graphic Ornaments
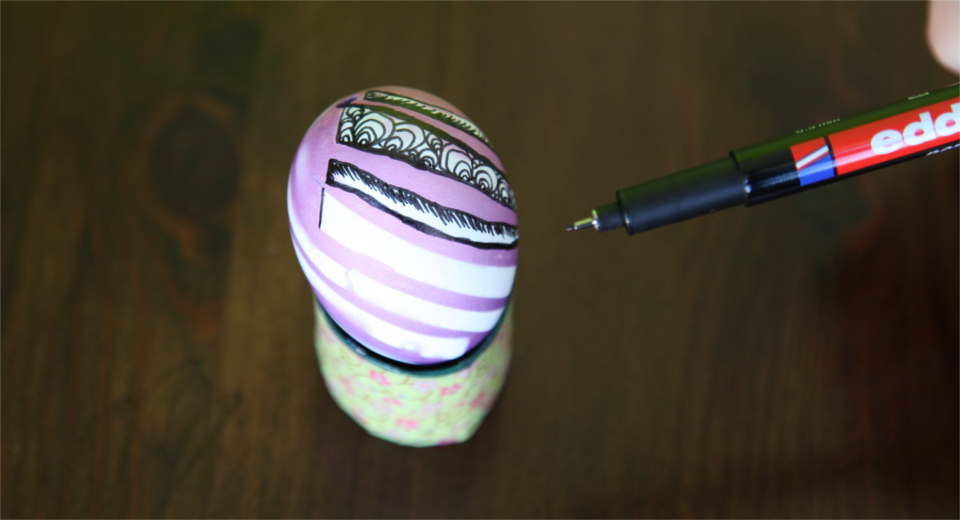
Once the eggs are dry, you can peel off the tape and have a colorful egg with patterns in the original egg color. To make the egg lie as still as possible, it’s best to put it in an egg cup and you can design it with the thinnest permanent marker possible. I used a 0.3 mm thin Edding 140 S permanent pen.
I first outlined the white patterns in black and then greased one side of each ornament. I also painted some eggs with lines shaded or different patterns.
You might also be interested in our other Easter ideas, other craft ideas and tips for activities with kids, your partner or with friends. And if you like our page, we’d love to have your Like on Facebook and Instagram! 🙂
*This article contains affiliate links: if you order something through them, we get a small commission, but nothing changes in the price.

![How To Make Sophisticated Patterned Easter Eggs With Tape Tutorial [Uber En="How*to*designing*patterned*Easter*eggs*with*gaffer*tape" De="Ostereier*gestalten*mit*Gaffer*Tape"]](https://greatime.de/wp-content/uploads/2018/03/ostereier-gestalten-tape-faerben.jpg)
![Uber En Quot Toilet Roll Star Quot De Quot Weihnachtsstern Quot [Uber En="How*to*make*your*own*toilet*roll*star*with*rhinestones" De="Einen*Weihnachtsstern*mit*Strass*zum*Aufhängen*als*Weihnachtsdeko*selber*machen"]](https://greatime.de/wp-content/uploads/2017/12/weihnachtsdeko-selber-machen-weihnachtsstern-mit-strasssteinen.jpg)

![Uber En Quot Witch Cauldron Card Quot De Quot Hexenkessel Karte Quot [Uber En="Handmade*Halloween*card*with*witch*cauldron" De="Halloween*Einladungskarten*gestalten*mit*Hexenkessel-Motiv"]](https://greatime.de/wp-content/uploads/2018/10/halloween-party-einladung-hexenkessel.jpg)