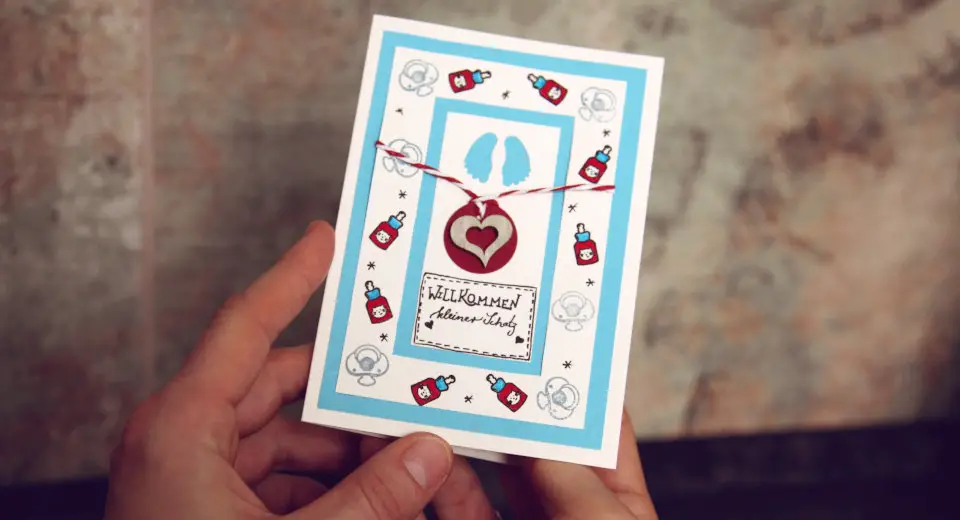
With stamps, punches and felt pens, you can create a beautiful DIY congrats baby boy card in a surprisingly short time. Simply buy the materials in advance and make the baby card with the instructions and modify it according to your wishes.
I came across the stamp. Or rather stamp sets, with which you can create beautiful cards and small gifts super easily without having to schedule a lot of time for it. And it is a lot of fun to create the cards. For this congrats baby boy card I used two stamp sets and several motif punches, which I use a lot. I use them to make cards for occasions, for gift tags, labels and small gifts – the investment has already paid off many times :-). As always, you can find all the materials I used on the material list* and you can design the card according to your taste, depending on what you have in stock.
I recently became a mum myself and, as it happens, a birth has taken on a different meaning for me among friends and family. Because I know very well what a cloud of happiness such a small miracle conjures up. And I now also know how great the joy is when baby cards and little presents arrive at the house. And I also know exactly how seldom self-made cards and gifts are among them, because time is in short supply for practically everyone. Since I usually buy a baby gift, I make the card myself with a lot of love. Each one is unique.
Want more baby card inspiration? On Greatime you can find even more instructions for DIY cards for the birth of girls and boys and decide which one you like best. For example, a Congrats newborn baby card with stamps, a baby card for a girl, a birth greeting card with baby name garland, a birth card with elephant and a cute baby card with animal letters.
How to Maket a Creative Congrats Baby Card

Once all the craft materials are to hand, the crafting is quickThe motifs on the baby card are suitable for the birth of a boy and a girl. Use a card in the colour of your choice, on the material list you can see that I used a set of coloured clay paper cards which contains many great colours in different paper thicknesses. Then colour the stamps to match your chosen colour in a bold contrasting colour.
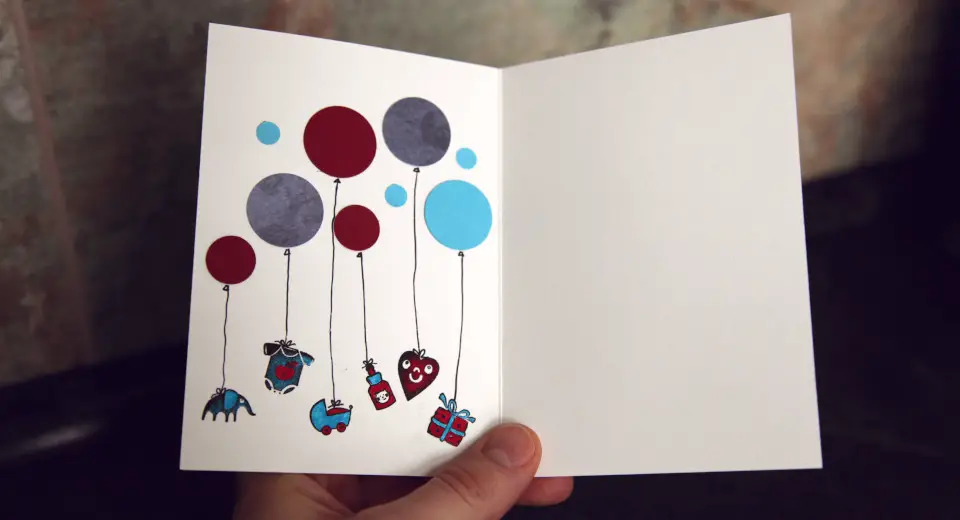
I also created and coloured the inside of the card with stamps, punches and pens to match the front. On the right is the text and a nice saying, on the left the card is not so empty. 🙂
Time: 45 – 60 minutes

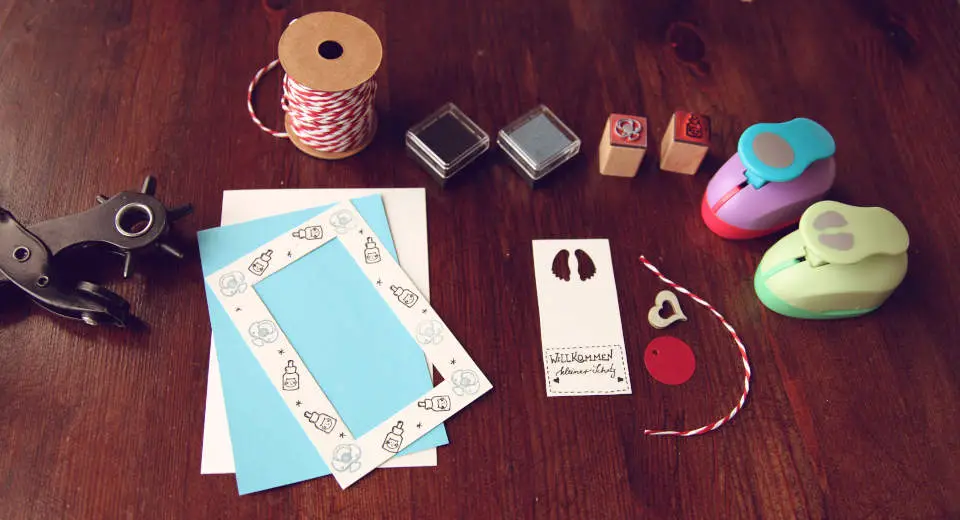
Material List*
- Blank double card, white, 10.5 x 15 cm with envelope and insert
- Coloured clay paper (light blue in my tutorial)
- Punch baby feet
- Punch Set Circles (3 sizes)
- Stamp set Baby Poetry Paper
- Stamp set Baby Heyda
- Stamp pad black and light blue
- black permanent marker 0.3 mm
- Stabilo Pen 68 Set
- 1 Streudeko Wooden Heart
- Red and white baker’s twine
- Glue stick
- Triangle
- Scissors
- Punch pliers
- Hot glue gun or glue pen
How to Craft the Front of the Congrats Baby Boy Card

The contrasting colour makes the motifs really come out
- Cut a 9.5 x 14 cm piece of light blue coloured paper. If you use the clay paper cards like I do, you only need to cut 1 cm off the bottom and right side.
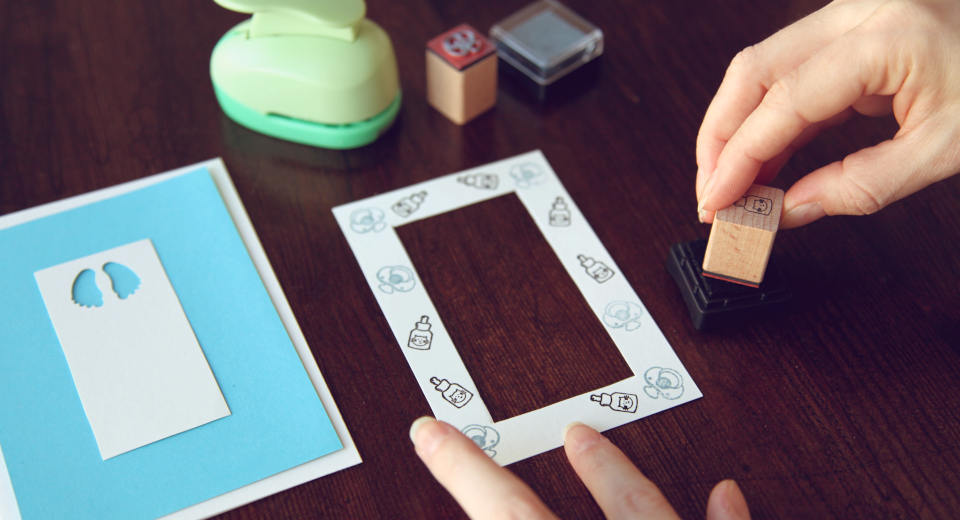
- Now use the insert card that comes with the double card and measure the following dimensions on the back with the set square: a 2 cm wide strip on the left and bottom, leave 1.5 cm as a frame, draw a 0.5 cm wide frame at a right angle on the inside. Cut this out so that you have a 1.5 cm wide frame and the rectangle inside the frame. (see picture above)
- Stamp the dummy onto the frame with light blue stamp ink and then stamp the bottles with black stamp ink and draw a few stars in between with permanent marker.
- Cut out the little feet from the upper third of the middle section and write “Welcome little darling” or your short text or the baby’s name in the lower third with the permanent marker and outline it.
- Paste the light blue paper on the double card and in the centre the rectangle with the little feet on top.
- Punch a circle with the biggest circle punch out of clay paper in your contrasting colour (burgundy for me), punch a small hole in the middle with the hole punch and glue the wooden heart on it.
- Thread the red and white baker’s twine twice through it so that a loop peeks out in the middle, through which you can thread the ends of the twine, and pull them carefully tight.
- Use the glue pen (alternatively, the hot glue gun or all-purpose glue will also work) to glue the ends of the baker’s twine to the right and left of the back of the stamped frame and glue it to the light blue clay paper.
- Now paint the vials in light blue (the colour of your chosen clay paper) and dark red (your contrasting colour)
Customise the Inside of the Card

Punch out 4 large round circles, two medium and three small circles from light blue, dark red and dark blue paper for the inside of the DIY birth card (use your chosen colours from the card front).
Stamp 6 cute baby motifs (stuffed elephant, baby bodysuit, pram, bottle, heart, gift) from the stamp sets as cute gifts offset on the bottom of the card and colour them in red-light blue (or your chosen colours). Connect the motifs with a circle as balloon strings and add the bows and balloon knots.
Have fun stamping, die-cutting and painting your DIY congrats baby boy card!
Always looking for quick crafting ideas for small gifts or to keep? On Greatime there are regularly new tips and ideas with instructions to try out! And if DIY isn’t on the agenda, you’ll find great ideas for special leisure activities with kids, friends and your partner on our leisure ideas portal.
Never miss a good idea again! Follow Greatime on Facebook and on Instagram.
*There are affiliate links in this article. This means that if you buy a product through one of these links, Greatime will receive a small commission. The product will not be more expensive and you support our blog.

![Congrats Baby Boy Card Cute Diy With Stamps Tutorial [Uber En="DIY*Congrats*newborn*baby*boy*card*tutorial" De="DIY*Karte*zur*Geburt*eines*Jungen*basteln"]](https://greatime.de/wp-content/uploads/2022/03/diy-karte-zur-geburt-junge-stempel.jpg)
![Uber En Quot Newborn Baby Card Quot De Quot Babykarte Quot [Uber En="Newborn*baby*girl*card*made*of*pink*and*turquoise*patterned*design*paper" De="Babykarte*basteln*für*ein*Mädchen*aus*pinken*und*türkis-gemusterten*Designpapier"]](https://greatime.de/wp-content/uploads/2021/07/babykarte-basten-maedchen-rosa-stempel.jpg)
![Uber En Quot Diy Easter Card Quot De Quot Osterkarte Quot [Uber En="If*you*would*like*to*make*an*DIY*Easter*card*that*is*unique,*you*can*find*the*instructions*on*Abenteuer*Freundschaft" De="Wer*eine*Osterkarte*basteln*möchte,*die*einzigartig*ist*findet*die*Anleitung*auf*Abenteuer*Freundschaft"]](https://greatime.de/wp-content/uploads/2021/03/osterkarte-basteln-anleitung.jpg)
![Uber En Quot Halloween Card Quot De Quot Halloween Karte Quot [Uber En="This*is*how*to*make*a*Halloween*invitation*card*with*a*skull." De="Eine*Anleitung*zum*Halloween*Einladungskarten*basteln*mit*dem*Motiv*eines*Totenschädels."]](https://greatime.de/wp-content/uploads/2018/09/halloween-einladungskarten-totenschaedel-gemalt.jpg)