Hello little earthling, how nice that you are here! I would like to make a very special birth greeting card for you and your parents. Here’s how it works.
A baby is born, gets a name – and is suddenly no longer “the baby” but a little individual with personality. Chosen with love, personal – that is exactly what a card for the birth should say! The closer you are to your parents, the harder it is to find a card in the shops – at least that’s how I feel.
So unpack your craft box and make a birth greeting card. There are great alphabets with animal letters on the internet that you can use for free. If you want to do it really quickly, just print out the letters of the name. I drew the letters with the animals myself. You can find everything you need to make them on the material list*.
Looking for more ideas? Here you can find another tutorial for a birth greeting card for a girl, a tutorial for folding a heart envelope and many more craft ideas.
How to Make the Birth Greeting Card

Time: 40-60 minutes
E like elephant, donkey, emu. R like caterpillar and rat. I like hedgehog – okay that’s a classic. K like crocodile and cockatoo. When learning letters, generations of teachers use animal ABCs. It looks cute, is original and creative – and takes about 40-60 minutes, depending on whether you draw the letters yourself or look them up on the internet and just print them out.
Material List*
- Blank folding card, light blue
- Scrapbook motif cardboard Far East
- Animal letters of the name
- Black pen
- 6 googly eyes
- Felt tip pens in different colours
- Backer’s twine, red and white
- Felt in any colour
- Washi tape, 0,5 cm
- Washi heart stickers
- Hot glue gun
- glue stick
- Punch pliers
- Scissors
- ruler
- Pencil
Paint or Print Animal Letters

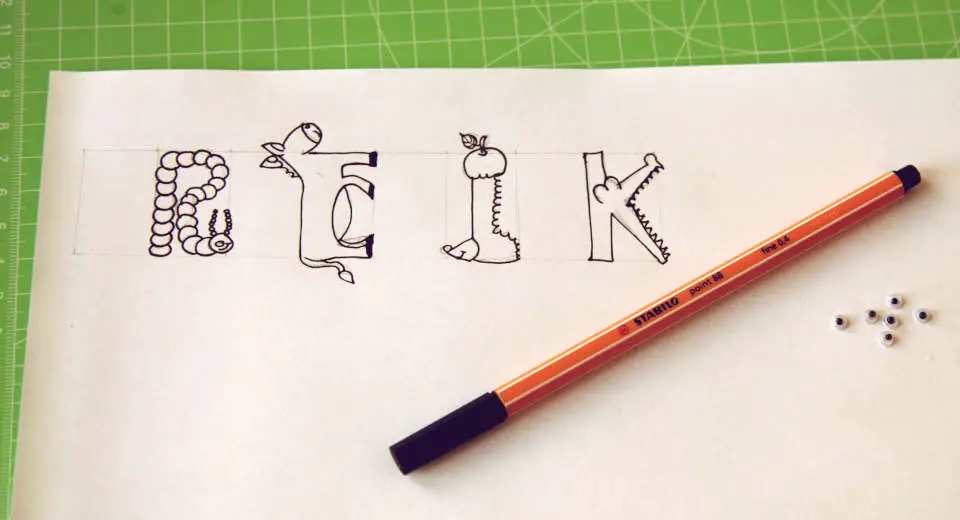
Paint letters in identical size: On a white DIN A4 paper, draw two parallel lines 2 cm apart in pencil. Mark boxes of the same size at a distance of 1.5 cm from each other. Use all the space available in every second box to draw a letter and the corresponding animal in pencil. Then trace the contours with a black fineliner and colour in the letters and animals in matching strong colours. I used a felt tip pen for this. Now cut out each rectangle, frame it in black and glue on the googly eyes.
Craft a Folding Card and Design the Front

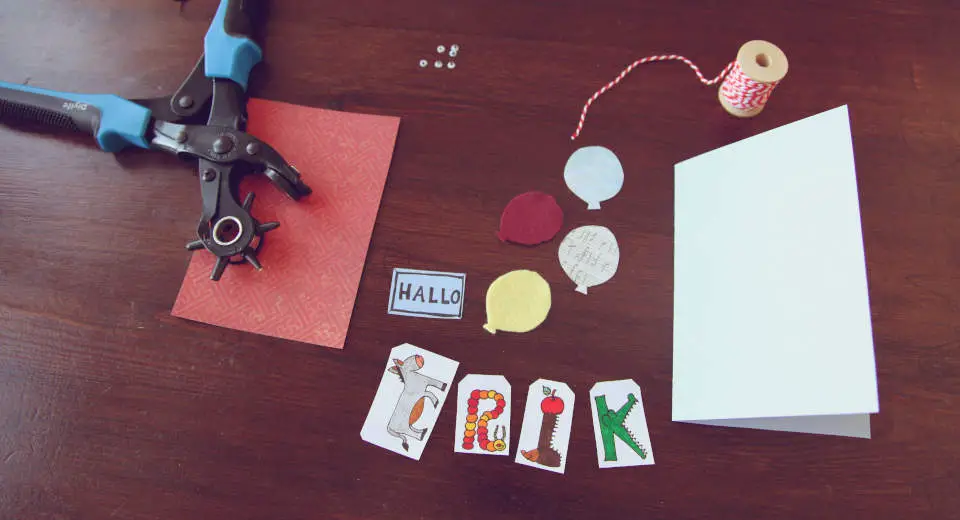
Measure out a 25 cm high and 21 cm wide strip on light blue clay paper or card, cut it out and fold it in half. Cut out a 24 cm high and 14.5 cm wide piece from red patterned motif card and stick it in the middle of the front.
Now cut out 5 balloons from felt and cardboard – one for the front, the other four are for the inside of the birth greeting card. Write “Hello” on a piece of light blue card, outline it with black fineliner and cut out the rectangle.

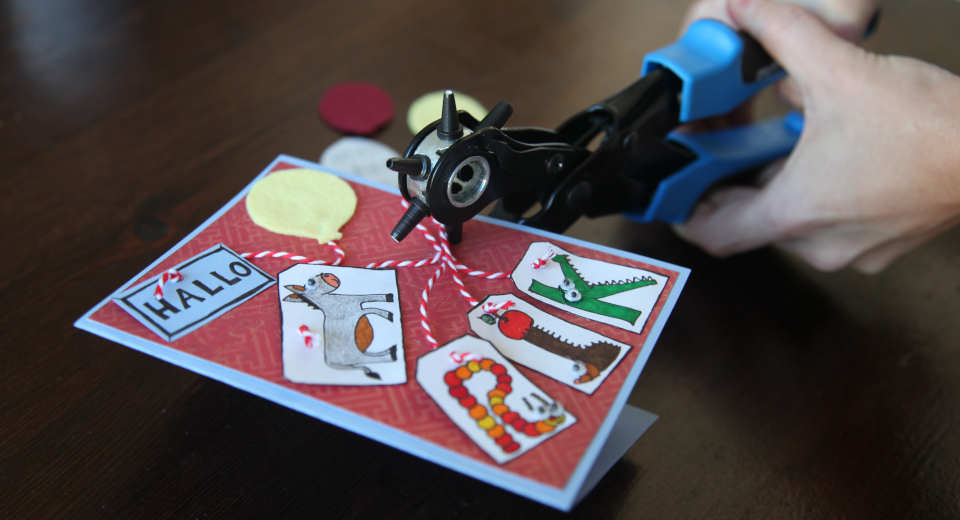
Using hole punch pliers, punch a hole in each letter, knot the end of a piece of baker’s twine about 8 cm long and thread it through the hole in each letter. Now glue the letters on, loosen the card on the right about 2-3 cm from the edge in the middle and thread the baker’s twine through. Now glue another balloon with the hello onto the card.
Crafting the Inside of the Birth Greeting Card

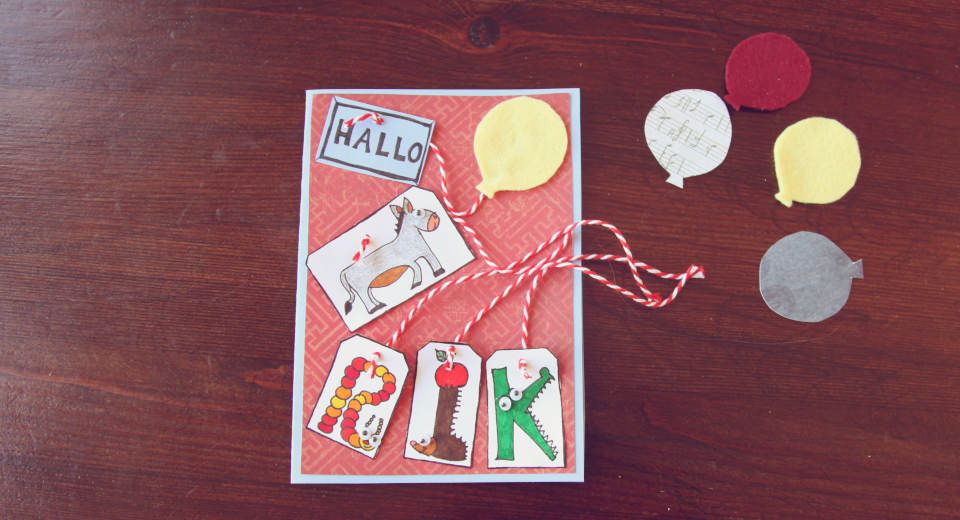
Pull the ends of the strings into the desired position – they should be loose, not tight. Glue a balloon onto each end of the string.
Along the bottom edge of the birth greeting card I stuck two braids with 0.5 cm wide Washi Tape. On the border under the balloons, you can paint a personal signature with stick figures, as I did.
Finally, I stuck a heart sticker on the back of the card and on the inside.
Have fun making your DIY birth greeting card!
Are you always on the lookout for creative ideas and open to trying out new things? Then you’re like us when we decided to bring Greatime to life. On our blog we write about our discoveries and self-tried leisure activities with kids, friends and the partner.
If you like our page, we’d love your Like on Facebook and Instagram. 😉
*There are affiliate links in this article. This means that if you buy a product through one of these links, Greatime will receive a small commission. The product will not be more expensive and you support our blog.

![Birth Greeting Card With Cute Animal Letters Diy Tutorial [Uber En="A*birth*greeting*card*with*cute*animal*letters" De="Babykarte*basteln*mit*süßen*Tier-Buchstaben"]](https://greatime.de/wp-content/uploads/2020/06/babykarte-basteln-buchstaben.jpg)
![Uber En Quot Diaper Cake Quot De Quot Windeltorte Quot [Uber En="How*to*make*diaper*cake*yourself" De="Anleitung*zum*Windeltorte*selber*machen"]](https://greatime.de/wp-content/uploads/2024/01/windeltorte.jpg)
![Uber En Quot Halloween Decoration Quot De Quot Halloween Deko Quot [Uber En="You*can*make*Halloween*candle*holders*from*empty*bottles" De="Aus*leeren*Flaschen*kann*man*Halloween-Deko*basteln"]](https://greatime.de/wp-content/uploads/2018/10/halloween-deko-basteln-kerzenstaender.jpg)
![Uber En Quot Christmas Decoration Quot De Quot Weihnachtsdeko Quot [Uber En="Salt*Dough*Christmas*Decoration*to*Hang" De="Salzteig*Weihnachtsdeko*zum*Aufhängen"]](https://greatime.de/wp-content/uploads/2017/12/salzteig-weiohnachtsdeko-schneeflocken-nachts.jpg)