You can make a cute oval gift bag from motif cardboard, which is a lovely eye-catcher as packaging for gifts or small presents. That’s how to make a gift bag from paper.
At Easter, for birthdays or for gifts, it is particularly suitable to make a gift bag. Inspired by Easter, I made an oval gift bag that is tied with a bow. Thanks to the thick cardboard and the wide handles, it is stable and you can also fill it with heavy small items. It is completely folded except for one glued edge.
Depending on the occasion for which you want to make the gift bag, you can freely choose the motif paper. In craft shops and on amazon* you can buy inexpensive pads with different motif papers in different thicknesses.
You can find all the materials I used to make the gift bag on the material list.
Material List*
- Print out template as a template
- Double-sided printed motif paper, 250 g/m²
- Green fabric gift ribbon
- Wooden scatter deco with punched out motif
- Scissors
- Cutter
- Hot glue gun
- Triangle
- Pencil
How to Make A Gift Bag
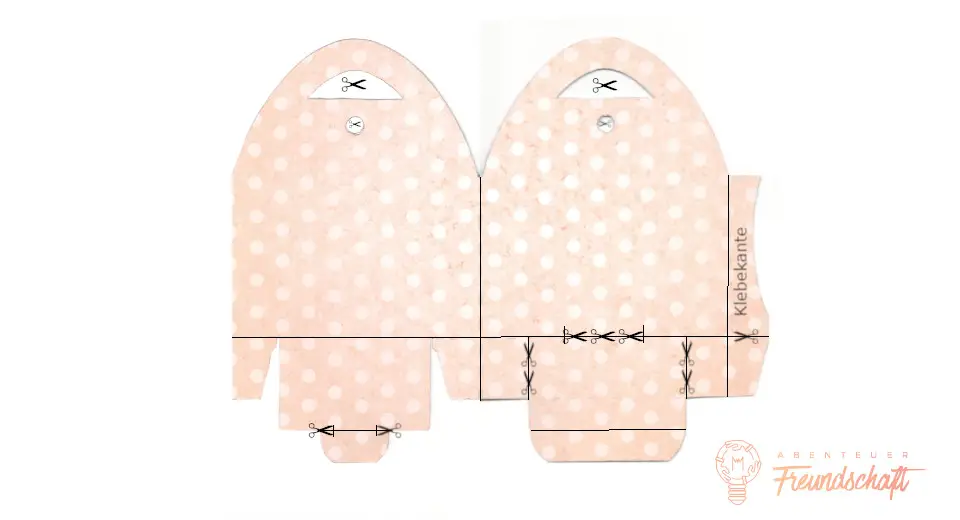
You can print out the template in any size and use it as a template. I used 250 g/m² thick double-sided printed motif cardboard to make the gift bag, but since the bottom is made of layers of paper folded over each other, thinner cardboard should also give a stable end result.
The thicker the cardboard, the less attractive the folded edges.
1. Print Out the Template, Cut It Out and Use It as a Template
Print out the template at the size you want and cut out the outline and handles. Then cut the side flaps and the closure flap to the point where the two lines cross (marked with the scissors).
Place the template on the side of the box that will become the inside and go around it. Use a thin pencil to mark the points where you want to fold the box afterwards.
Use the cutter to cut out the place through which you push the flap at the bottom of the bag (marked with the three scissors), as well as the two round holes.
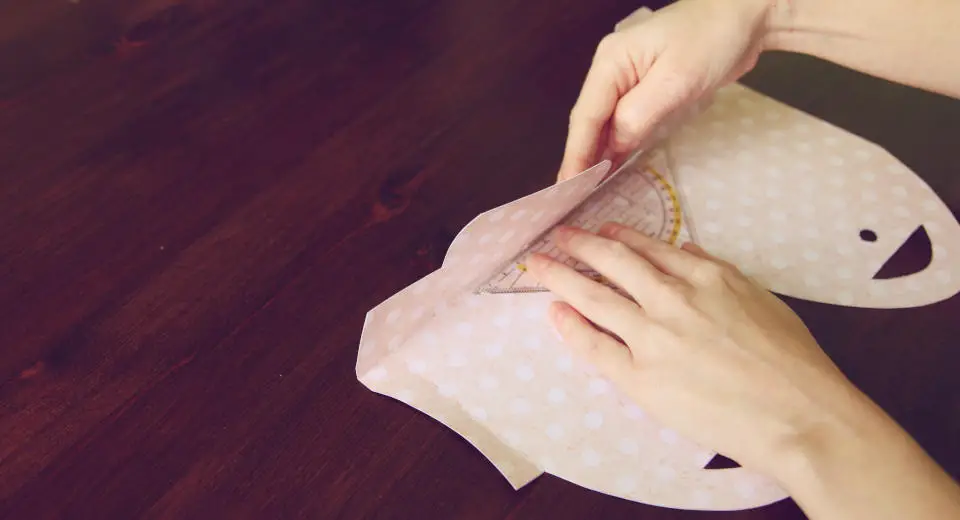
Tip: To avoid unsightly pencil marks on the fold lines on the inside, I usually mark the points where two fold lines cross. Then you simply place the triangle at these connection points and fold the folded edge over the triangle. This way you get nice straight edges and hardly need to fold them again when folding.
2. Making the Gift Bag
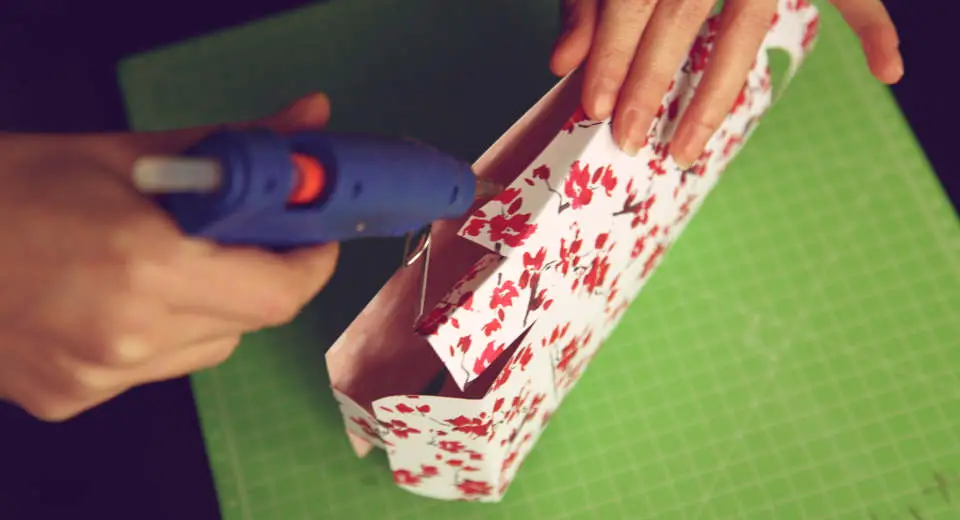
Now glue the two protruding glue edges to each other at the edges of the gift bag.
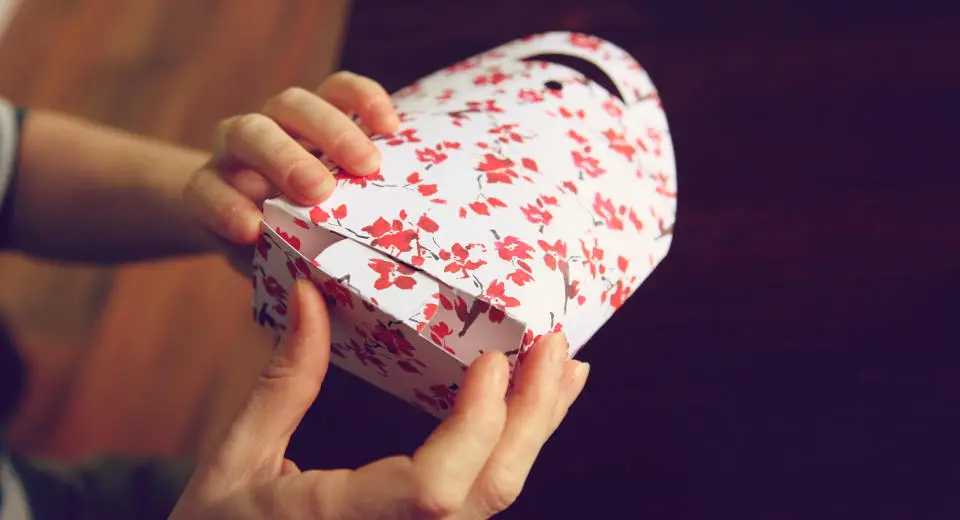
Then fold in the right and left side pieces at the bottom, fold in the long side with the notch and push the flap through the notch. Now reach into the bag and pull the flap upwards until all edges are in place and the bag stands up well.
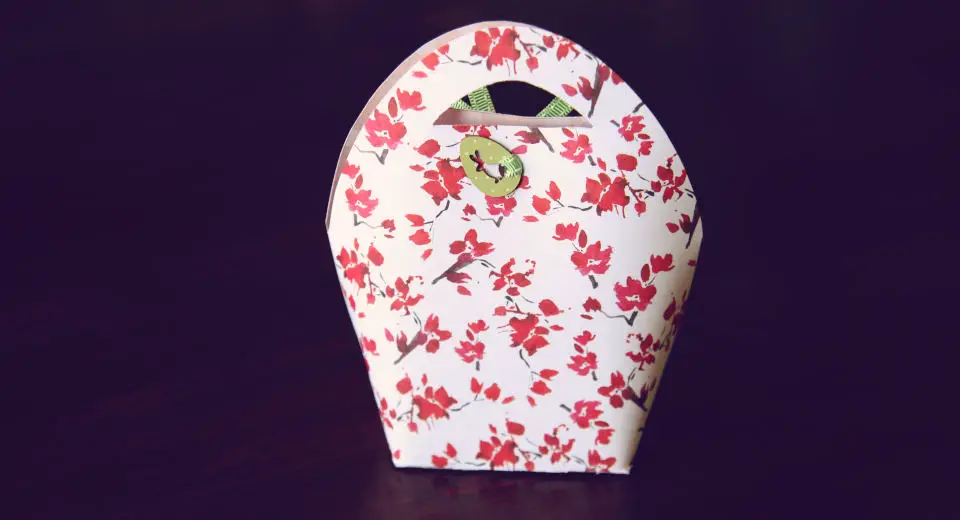
After you have put your gift in the bag, thread one end of the fabric ribbon through the hole. Thread an openwork decoration motif onto it (for me, it’s the Easter bunny, but there are also butterflies, flowers, hearts and many more) that is larger than the hole. This ensures that the ribbon does not slip through.
On the outside, tie the two ends of the ribbon into a bow and close the bag.
Did you like these instructions for making a gift bag? We appreciate your Like our Facebook page and on Instagram!
By the way, there are many more crafting ideas and many ideas for personal gifts at Greatime. Hundreds of ideas for gifts and activities with children, friends and your partner are waiting for you on the leisure ideas portal! 🙂
*There are affiliate links in this article. This means that if you buy a product via such a link, Greatime may receive a small commission without the product becoming more expensive.

![How To Make A Gift Bag From Paper With Free Template Tutorial [Uber En="This*is*how*to*make*a*gift*bag*with*motif*paper*and*fabric*ribbon." De="Zum*Geschenktasche*basteln*benötigt*man*Motivpapier*und*Stoffband."]](https://greatime.de/wp-content/uploads/2019/07/geschenktasche-basteln.jpg)
![Uber En Quot Voucher On Wood Quot De Quot Gutschein Auf Holz Quot [Uber En="How*to*make*travel*voucher*for*a*trip*on*a*wooden*board" De="Kreativer*Gutschein*für*einen*Ausflug*auf*einem*Holzbrett"]](https://greatime.de/wp-content/uploads/2020/02/gutschein-fuer-ausflug-gestalten-textrolle.jpg)
![Uber En Quot Gift Box From A Pringels Tin Quot De Quot Geschenkbox Aus Einer Pringelsdose Quot Dose 960x520 [Uber En="You*can*make*a*DIY*round*gift*box*out*of*a*Pringels*tin" De="Aus*einer*Pringelsdose*kann*man*eine*runde*Geschenkbox*basteln"]](https://greatime.de/wp-content/uploads/2018/12/runde-geschenkbox-basteln-pringelsdose-960x520.jpg)
![Uber En Quot Easter Gifts Quot De Quot Ostergeschenke Quot [Uber En="The*Easter*Bunny*brings*especially*funny*Easter*gifts*this*year" De="Der*Osterhase*bringt*dieses*Jahr*zu*Ostern*besonders*lustige*Ostergeschenke"]](https://greatime.de/wp-content/uploads/2017/04/lustige-ostergeschenke-1.jpg)