Stylish Halloween decoration with upcycling: so you can easily transform empty food cans into Halloween lanterns with pretty motifs!
We are big friends of upcycling: why throw away what you can still make something beautiful? In keeping with the season and the approaching Halloween, we have made lanterns with scary motifs from tin cans.
Actually quite simple: here you can learn how to do it!
What You Need – Material for Halloween Lanterns
- Empty food cans
- Cleaning agent (vinegar will do), brush
- Permanent marker or alternatively scissors, pen & paper
- Motif templates (from books, from pictures or from the internet)
- Hammer
- Long Nails
- Spray paint (black in our example)
- Candles or Tealights
Halloween Lanterns – Instructions in 7 Steps
1. Peel off the Labels and Clean the Tin Cans
The easiest way is to soak the empty food cans in water for a while in the kitchen sink. Then the labels can be peeled off easily.
However, there may be some stubborn residue or glue left behind. I got these off with conventional table vinegar and a brush. Surely other “sharp” cleaning agents such as turpentine are also suitable for this.
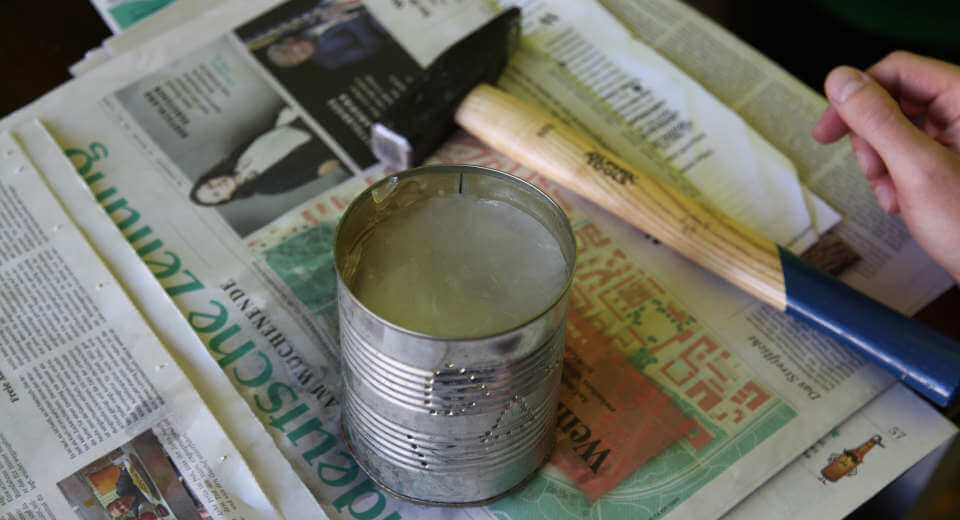
2. Fill With Water and Freeze

Once the food cans are clean, fill them to the top with water and place them in the freezer overnight.
This serves to provide resistance in the can later when hammering holes through the ice, making it less likely to dent.
3. Select Motifs
While the ice cream is freezing in the cans, you can think about the motifs you want to decorate them with. As you can see in our pictures, the motifs are created by lines of holes in the can, through which the light of the candle shines later.
The motifs for Halloween candles can be anything that fits this holiday: a pumpkin face, a witch, a hunchbacked cat, a ghost, a skull, a raven, a witch’s hat, etc. Alternatively, you can use letters, for example, a witch’s hat. Alternatively, letters work too, for example, you could hammer in “Happy Halloween.”
We decided on different picture motifs and noticed: The more intricate the lines, the more difficult the implementation! So for the first box at least, we recommend choosing a simple motif made up of a few clear lines. You can always increase ?.
4. Pre-draw or Glue Motifs on Cans

When you take the food cans out of the freezer, you have 3 options to put the motif on it as a template:
- You pre-draw it with permanent marker. As we found out, this is on frozen cans but not so easy, because in the heat condensate forms quickly on it.
- You pre-draw the motif on paper, cut it out and stick it with something that comes off well again, for example, double-sided tape temporarily on the can.
- You can just have the template next to it and work without pre-drawing – but this is not easy at all because of the roundness of the can.
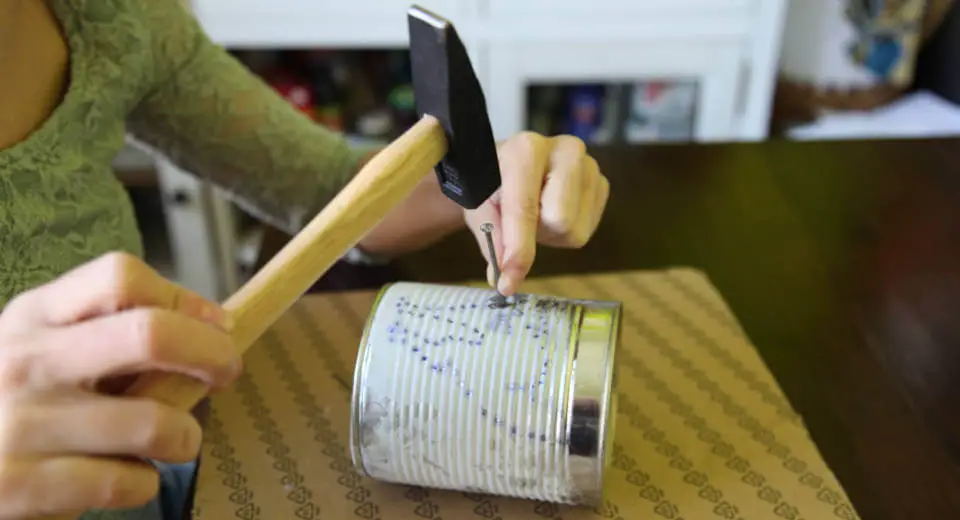
5. Hammer in Motifs

Now comes the most important step: hammering in the motifs. For this it is important to have a good hammer, preferably with a heavy head and a long nail. This is the best way to do it!
It is also important to choose a non-slip surface and to create enough space in the room where you are tinkering so that nothing lies nearby that must not get wet.
In the distance of a few millimeters you now hammer holes according to the lines of the motifs.

Some difficulties you should be prepared for:
- The can can slip away. Best to wedge it between heavy objects.
- The ice in the cans now begins to melt and so it may happen that when hammering some ice jumps off and flies away. However, it will also not be a giant mess, do not worry!
- At the top of the can the ice melts first, so you should start here, because without resistance it is harder to hammer.
- The grooves that a tin can typically has can make hammering more difficult. It’s easier to hammer holes between the grooves than directly on top of them.
- Freezing cans can cause the bottom of the can to bulge. Simply knock flat again with a hammer!
6. Spray Cans Black

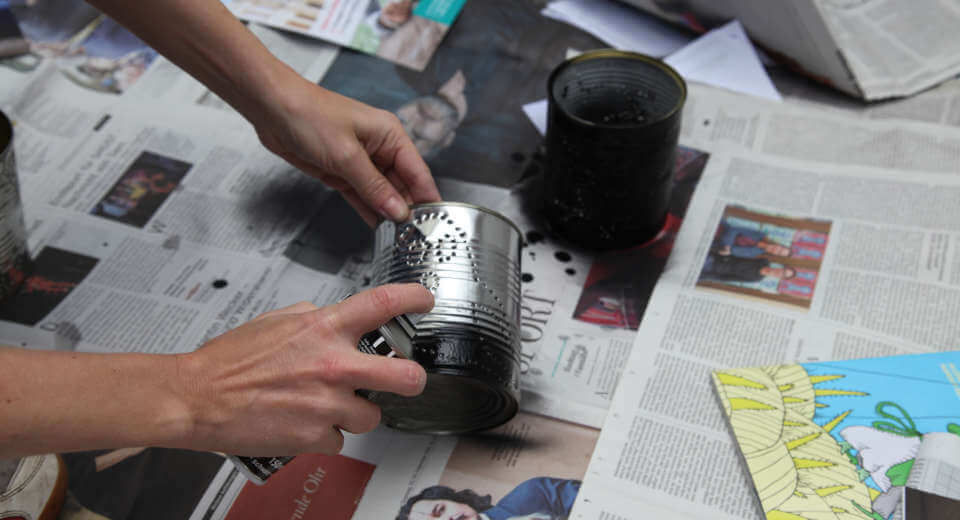
Once you’re done hammering, first melt the ice in the cans and dry them off. Now they can be sprayed on. We chose black for our Halloween lanterns because that’s the best way to show off the orange candlelight, and it goes well with the gloomy style of this holiday. But of course you can use any other color of your choice.
Spraying is best done outside and line the ground with newspapers in a radius of about 2 meters. Then simply proceed according to the instructions of the respective spray paint. Usually several layers are necessary to achieve the desired result.
7. Put In Candles or Tea Lights
Almost at the finish: now just find the right candle. Tea lights work in any case, but it’s best to compare yourself times, with which candle you achieve the most beautiful effects.
Have fun making Halloween lanterns!
At Greatime, you’ll find even more tutorials for Halloween, including Halloween card ideas, how to carve a Jack Skellington Halloween Pumpkin, and how to make decorative Halloween candle holders. Discover even more easy crafting ideas with instructions to follow! Around the year, the Leisure Ideas portal offers inspiration for gifts and activities with kids, friends and your partner.
Never miss more ideas from Greatime? Then just follow us on Facebook and / or subscribe to our newsletter.
*This article contains affiliate links. If you order products through these links, we receive a small commission without changing the price.

![Halloween Lanterns From Food Cans Craft Tutorial [Uber En="Halloween*lanterns*made*from*tin*cans" De="Halloween*Windlichter*basteln*aus*Konservendosen"]](https://greatime.de/wp-content/uploads/2018/10/halloween-windlicht-konservendose.jpg)
![Uber En Quot Halloween Decoration Quot De Quot Halloween Deko Quot [Uber En="You*can*make*Halloween*candle*holders*from*empty*bottles" De="Aus*leeren*Flaschen*kann*man*Halloween-Deko*basteln"]](https://greatime.de/wp-content/uploads/2018/10/halloween-deko-basteln-kerzenstaender.jpg)
![Uber En Quot Vampire Games For Kids Title Image Quot De Quot Vampirspiele F R Erwachsene Titelbild Quot [Uber En="Vampire*Games*for*Kids" De="Vampirspiele*für*Erwachsene"]](https://greatime.de/wp-content/uploads/2022/09/vampirspiele-fuer-kinder-pommeskind.jpg)
![Uber En Quot Halloween Games For Teens Are Ideal For A Teen Halloween Party Quot De Quot Halloween Spiele F R Teenager Sind Ideal F R Eine Teenie Halloweenparty Quot [Uber En="Halloween*games*for*teens*are*ideal*for*a*teen*Halloween*party" De="Halloween-Spiele*für*Teenager*sind*ideal*für*eine*Teenie-Halloweenparty"]](https://greatime.de/wp-content/uploads/2017/10/halloween-spiele-fuer-teenager.jpg)